Industrial Categories
see the categories and sub-categories
- Automation Network
- Calibration Services
- Health & Safety
- Logistics
- Machinery Safety
- Monitors
- Measurement & Control
- Panel Meters
- Sensors
- - Accessories
- - Capacitive
- - Compressed Air Dew Point
- - Compressed Air-Flow
- - Compressed air oil content
- - Conductivity
- - Dissolved Oxygen
- - Distance
- - Flame-Fire
- - Flow-Air
- - Flow-Liquids
- - Flow - Solids
- - Gases-Flammable
- - Gases-Toxic
- - Humidity for High Temperature
- - Humidity - Relative
- - Inductive
- - Laser
- - Level - Continuous
- - Level - Point
- - Magnetic
- - PH
- - Photocells
- - Pressure
- - Solar
- - Temperature-Contact
- - Temperature Non-Contact
- - Ultrasonic
- Thermal Imaging
- Wireless Communication
Pressure
A simple definition of pressure is the force exerted by a gas or fluid over an area. Another method of defining pressure is in terms of a column of liquid, where pressure is directly related to the height and density of the liquid. In a pressure transducer energy in the form of pressure is sensed and converted to an electrical signal (current or voltage). The relation between the actual electrical output to the theoretical output across the pressure range of the unit is termed as the accuracy of the transducer or transmitter.
Pressure is an important parameter in industrial applications, HV-AC management, as well as weather monitoring.
Compact Precise Analogue Vacuum Transducers
|
| Pressure and vacuum sensors and transmitters | |
 |
The pressure and vacuum sensors we provide, are designed to monitor system pressure in hydraulic, pneumatic and sanitary applications. With no moving parts such as pistons or springs that can stick or break, these pressure and vacuum sensors are a solid-state solution to mechanical switches. Operating principle - ceramic cell Operating principle - strain gauge (PK switch only) Product overview Absolute, gauge and vacuum scales |
 |
Model PK. Pressure switch with easy set up using mechanical adjustment dials. Wire strain gauge in thick-film technology on a stainless steel measuring cell are distinguished by their very compact and robust design. The welded stainless steel measuring cell without any seals ensures a high degree of safety. The three to thirty times greater bursting pressure, depending on the selected measuring range of the unit, and the high shock and vibration resistance support the maximum operational safety of these pressure sensors.Measuring ranges: up to 10 bar for pneumatic systems, up to 100 bar for hydraulic systems, up to 400 bar for liquids and gases. DC dual switching output. Process connections: pneumatic systems G¼A, hydraulic systems ¼" NPT, liquids and gases 1/4" PT & M5I |
| Pressure sensors with ceramic measuring cell Due to an optimised support in the process connection the units with a ceramic measuring cell are designed for highest stress with nominal pressures of -1 to 600 bar. These sensors are extremely robust against mechanical influence and work completely without wear and tear or fatigue. The resulting long-term stability ensures safe operation and reliable measurement results over 100 million pressure cycles. |
|
 |
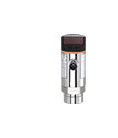
Model PN. Pressure sensors with 4-digit numeric display Measuring range from -0,01...0,25 to 0...600 bar, power supply 20..30/18..36 DC / 85...265 AC DC dual switching output DC switching output AC switching output DC analog (4...20 mA / 0...10 V) and switching output |
 |
Model PS.
Backpressure measurement of part-seated sensor for critical gap detection monitoring. |
 |
Model PNI. Differential pressure system
Suitable for relative pressure of liquids and gases. |
 |
Model PI. Flush-mount high-temperature pressure transmitters with four-digit bright numeric display indicating system pressure and output status. Measuring range from -0,01...0,25 to -1..25 bar. DC analogue and switching or dual switching output
* Simple pushbutton setup reduces installation time |
 |
Model PIM. Combined sensor for pump diagnosis and pressure monitoring G1 A, with numeric display.
DC analogue output. Measuring range from -1...10 to -1..25 bar. |
 |
Model PA. Pressure transmitter
Suitable for Liquids and gases (limited to max. 25 bar for gases), |
 |
Model PL. Pressure transmitter
A range of pressure transmitters with a flush mountable connection for reliable signal processing in hygienic areas, viscous media and liquids with suspended particles., 4...20 mA analogue output, 3-wire DC; 2-wire DC, 14...30 DC, accuracy < ± 0.6, -12.5...250 mbar, 50...1 000 mbar -0.13...2.50 bar, -0.5...10 bar, -1.0...25 bar, -1...100 bar. Their scalable 4 to 20 mA analogue signal is freely adjustable within the normal pressure range with an optional parameter setting accessory. |
| Sanitary applications In food, beverage, and pharmaceutical industries, sensors are exposed to pressure cleaning with caustic and acid solutions. The products offered are designed and tested to withstand this environment and reliably perform in these conditions. |
|
 |
Model PIM.
Combined sanitary pressure sensor for pump diagnosis and pressure monitoring for Aseptoflex adapter with numeric display. DC analogue output. Measuring range from -1...10 to -1..25 bar.
|
 |
Model PI. Sanitary pressure transmitter with four-digit numeric display
Measuring range from -0,12...2,5 to -1..25 bar. DC analogue output DC analogue and switching output
|
 |
4003 the economical series
Utilising unique manufacturing techniques the 4003 general-purpose pressure transducers incorporate bonded strain gauge technology and is designed for applications where economical price and reliable pressure measurement is required. Constructed from stainless steel with 17/4PH stainless steel diaphragm for ranges above 20bar, and a ceramic diaphragm for lower ranges, the 4003 series of transducers are of a robust yet compact design with accuracy of 0.40% NLHR. Available in pressure ranges from 0-0.5bar to 0-700bar,gauge or absolute and electrical outputs 0-2mV/V, 0-5Vdc, 0-10Vdc and 4-20mA (two wire). Applications include the continuous monitoring of oil, gas, water and other liquids in a wide range of industries. |
 |
4200 Series - General purpose pressure transducer
The 4200 series pressure transmitters are designed to meet the operational requirements of demanding pressure measurement applications where good quality, and low cost are of the highest priority. The unique Silicon-on-Sapphire sensor technology provides outstanding performance and gives excellent stability over a wide temperature range. The advanced sensor design consists of a piezoresistive silicon strain gauge circuit, which is epitaxially grown onto the surface of a sapphire diaphragm to form a single crystalline structure. The sapphire sensor element is then molecularly bonded to a titanium alloy sub-diaphragm. This enables the sensor to endure higher over- pressures and provides superb corrosion resistance. The completed sensor exhibits virtually no hysteresis and excellent long-term stability. With outstanding insulation properties, the sapphire substrate protects the strain gauge circuit from electromagnetic pulse radiation and allows the sensor to operate over a very wide temperature range without loss of performance. |
| Differential Pressure Transmitters | |
 |
model 3200DP The 3200 Differential Pressure Transmitter uses two ceramic pressure diaphragms, offering high stability and performance with true wet/wet operation, suitable for use with all liquids and gases compatible with stainless steel and alumina. Flush diaphragm models are available with integral or remote pressure diaphragms for hygienic applications. • Accurate at very wide D.P. range • High stability and repeatability • Wet/Wet operation • 4-20mA, two wire output • Zero & span adjustable • Ranges from 0~250 mbar DP to 0~200 bar DP • Uni + Bi-Directional • Accuracy:±0.3% • Power supply: 13-36VDC • IP Rating:IP65 • Available ATEX Certified |
 |
Low range differential pressure measurement transmitter 6340
The 6340 was developed specially for the measurement of differential pressures <50 Pa, such as those occuring in cleanrooms. With this differential pressure measurement cell, it is possible to measure differential pressures in this low range, but also to record up to +/- 100,000 Pa differential pressure highly accurately. In the models 6341/6343 with the built-in zero-point calibration, any zero-point drift is eliminated. The magnetic valve mechanism furthermore protects the instrument from overload through short-term pressure peaks. Technical data model 6341/6343 model 6342/6344 |
| Submersible Hydrostatic Pressure Transmitters | |
 |
3400 series of submersible hydrostatic pressure transmitter for level measurementThe 3400 series submersible depth and level transmitters have been designed for the accurate measurement of the depth and level of fluids. An output signal of 4-20mA is standard, along with in-head or remote amplifier with zero/span adjustment. The standard depth transmitters is fitted with a nylon nose cones to prevent sludge build-up. The 3440 bore hole transmitter is designed to measure depth and level in bore holes of 25mm diameter. Features • High Stability and repeatability • All stainless steel housing • Resistant to high voltages surges • 4-20mA, two wire output • Zero & span adjustable • Ranges 0-3mtr to 0-500mtr • Pressure tight cable sheath for trouble free venting |
Pitot 
|
PITOT Tubes
A pitot tube is a pressure measurement instrument used to measure fluid flow velocity. The pitot tube was invented by the French engineer Henri Pitot and it was modified to its modern form by French scientist Henry Darcy. It is widely used to determine the airspeed of an aircraft and to measure air and gas velocities in industrial applications. The front hole is placed in the airstream to measure what's called the stagnation pressure. The side hole measures the static pressure. By measuring the difference between these pressures, you get the dynamic pressure, which can be used to calculate airspeed. In industry, the velocities being measured are often those flowing in ducts and tubing where measurements by an anemometer would be difficult to obtain. In these kinds of measurements, the most practical instrument to use is the pitot tube. The pitot tube can be inserted through a small hole in the duct with the pitot connected to a differential pressure gauge for determining the velocity inside the ducted wind tunnel. One use of this technique is to determine the amount of cooling that is being delivered to a room. The fluid flow rate in a duct can then be estimated from:
Sigma Hellas has a wide range of Pitot tubes to choose for your application Type L, type L with Thermocouple K, NPL model, as per AFNOR NFX 10 - 112 norm, with ellipsoidal head. Working temperature from 0 to 600°C. Optional: TIG welding for high temperature applications (Pitot tubes up to 1000°C, except on TP Ø 03 mm) Options and accessories Connection glands for fixed installation of the Pitot tubes Flexible tubing Stainless steel sliding connectors Teflon sliding connectors Stainless steel mounting brackets for Pitot tubes Ø 3 and 6mm, Ø 8mm, Ø 12mm, Ø 14mm, 28mm Multi-hole pressure probe Multi-hole pressure probes (also called impact probes) extend the theory of pitot tube to more than one dimension. A typical impact probe consists of three or more holes (depending on the type of probe) on the measuring tip arranged in a specific pattern. More holes allow the instrument to measure the direction of the flow velocity in addition to its magnitude (after appropriate calibration). Three holes arranged in a line allow the pressure probes to measure the velocity vector in two dimensions. Introduction of more holes, e.g. five holes arranged in a "plus" formation, allow measurement of the three-dimensional velocity vector. |


